

First of all you will want to find out the dimensions of your blog so that your header fits in to the template. To do this all you need to do is log into your blogger account, click on Template and then click on Customise.


Then when you are on the template click on Adjust Widths and make a note of the number of px.


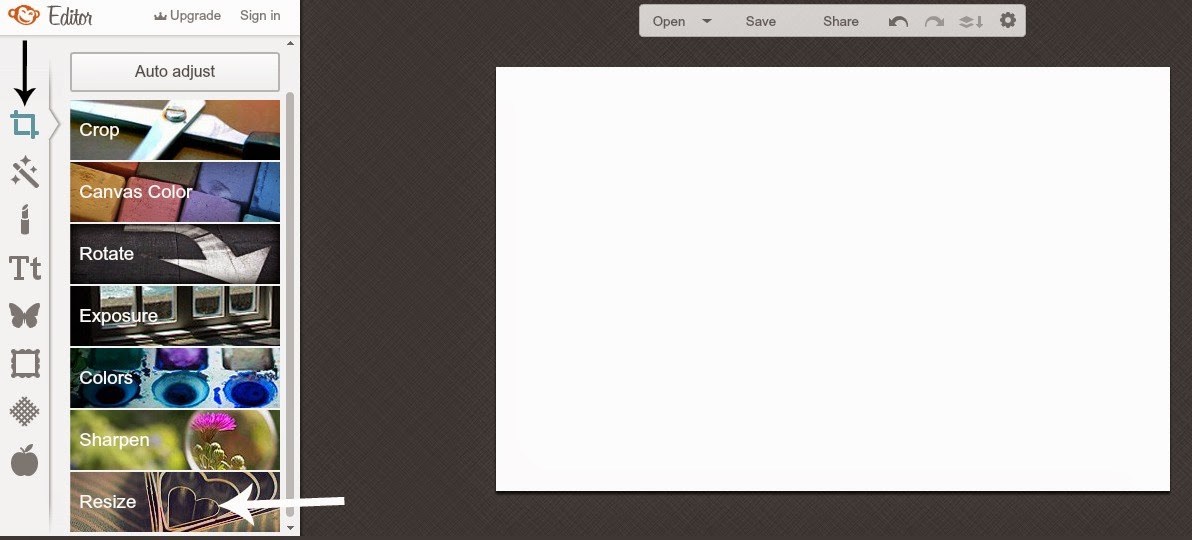
I am using a photo editing site called PicMonkey to create the header.
Click on upload and upload a plain white picture, a picture you want as your background on your header, etc.

Then click on the top icon (basic edits) and scroll down to the Re-size button and click on it. This is then when you enter the number of px of your blog template in the first box and in the second box enter whatever number you want so that you get the header looks how you want it too, then click on Apply.

Now onto creating the look of your header. Add your blog name/title by clicking on the Text button. Choose the font you like best and then type in your blog name/title. From there you can change the size and colour and edit it to how you want it to look.


You can either leave it like that or add in other things. If you wanted to add images just click on Overlays. From there you can add any from the site or even upload a picture of your own.

When you are happy with how it looks click on Save and save it to your computer.


Then go back to your blogger account and click on Layout. Then click on Edit on the header section.


Then upload the image of your header and then click on Save. When you have done that click on the Save Arrangement button.


Congratulations you have now created and added your own custom blog header! Now all you have to do is go out and get a celebratory nail polish/lipstick! (That is if you want to!)
I hope that this tutorial has helped, if you have any problems at all you are very welcome to ask me a question, and I will do my best to help you out! If you do create a header I would love to see it, so leave me a link in the comments or even tweet me your link!
Love Bella x
Bloglovin' I Twitter I Pinterest I Instagram


.JPG)


.JPG)


No comments:
Post a Comment
Thank you for leaving a comment, I love reading them and always try to reply x